Cloudflare supports 1-click setup with Mango Mail. This means you can skip the hassle of configuring DNS manually.
Introduction
Before you can start creating mailboxes with Mango Mail, you’ll need to set up the proper Domain Name System (DNS) records. This article will focus on configuring your domain using Cloudflare nameservers.
Prerequisites
- Create and set up your Mango Mail account.
- Own a domain.
- Use Cloudflare as your nameservers.
- Add your domain through the Mango Dashboard.
Step 1. Go to your Cloudflare dashboard and click on your domain.

Step 2. Click the "DNS" tab.

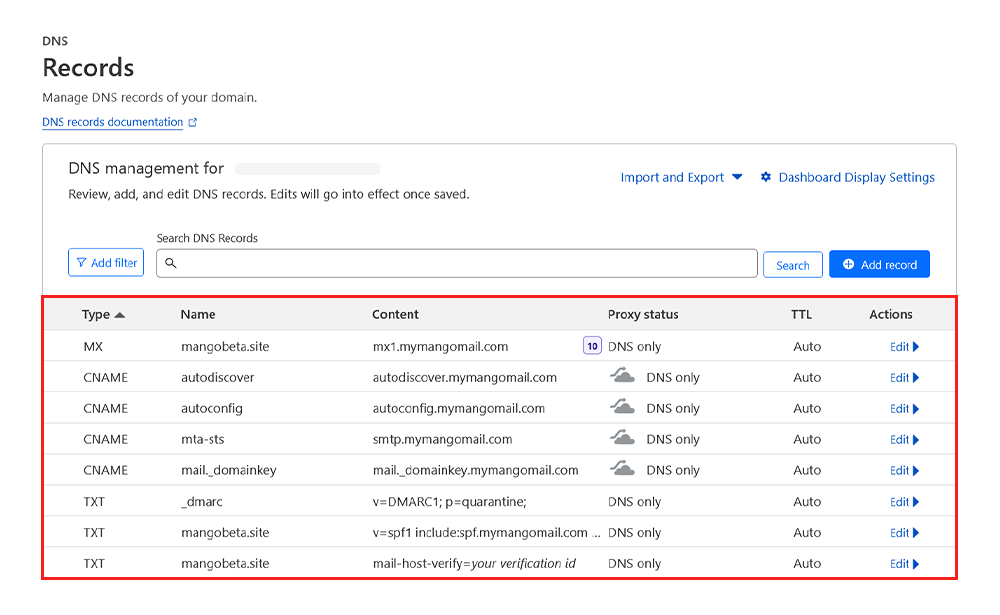
Step 3. Use the "DNS management" section to create new records.

Do not proxy CNAME records when configuring your Mango Mail DNS. These need to go directly to the values listed in the Mango Mail Dashboard.
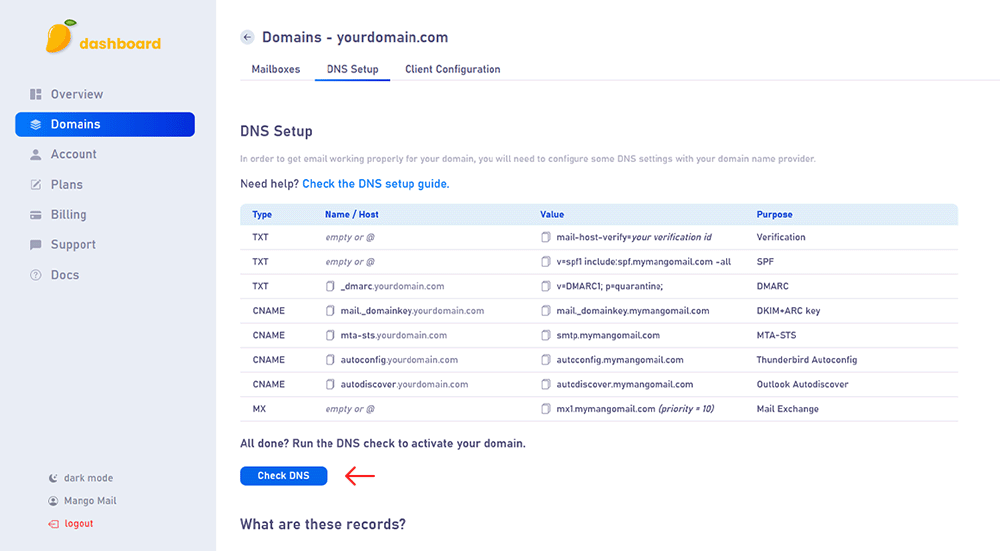
Step 4. Create the records shown on the DNS Setup page of your Mango Mail dashboard.
Cloudflare also supports importing DNS zone files. On your Mango Mail DNS setup page, click the "Export to file" button to download a zone file with all of the required DNS records. You can then upload this file using the "Import and Export" button on the Cloudflare DNS management page. Make sure to uncheck "Proxy imported DNS records".
Step 5. Finally, return to the Mango Dashboard and click "Check DNS".
Next Steps
Now that you've finished configuring your domain's DNS, you can start creating mailboxes from the Mango dashboard.