Introduction
Sometimes it can be easier to access your professional email alongside your personal ones through a shared web client. In this article we'll discuss how to achieve this with the Gmail web client and a Mango Mail address. However, you can follow these steps for any professional email.
Gmail only supports connecting external mailboxes through POP3 which is an outdated protocol and does not allow for synchronization across devices. Gmail also polls for messages much less frequently than most clients. It is highly recommended to use a proper desktop client instead of the Gmail web client.
Prerequisites
- Create and set up your Mango Mail account.
- Create a new email address through the Mango Dashboard.
- Have a Gmail account.
Step 1. Sign into your Gmail.
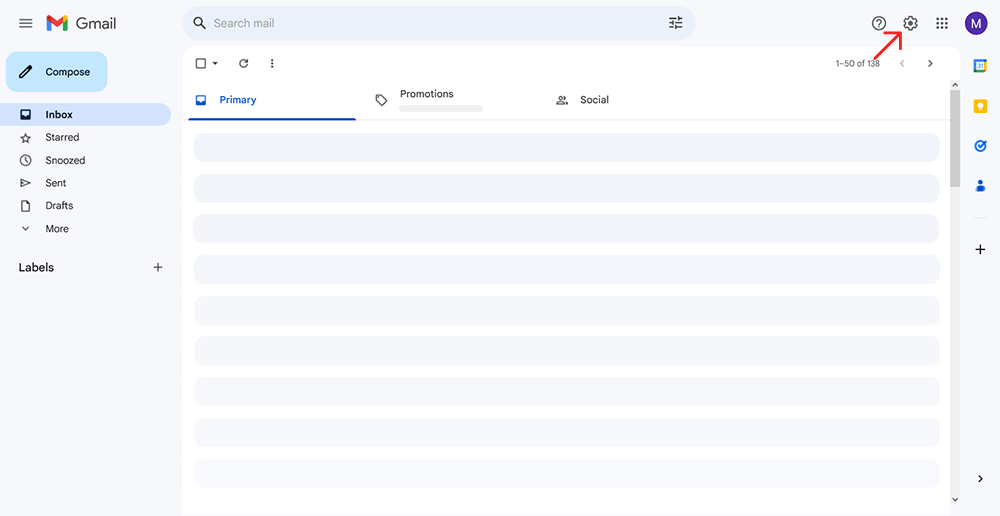
Step 2. Click the settings icon in the top right corner and click "See all settings".
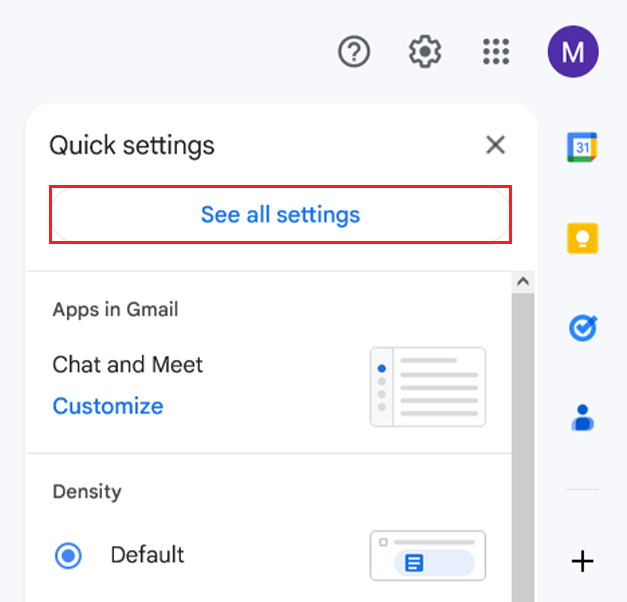
Step 3. Switch to the "Forwarding and POP/IMAP" tab.
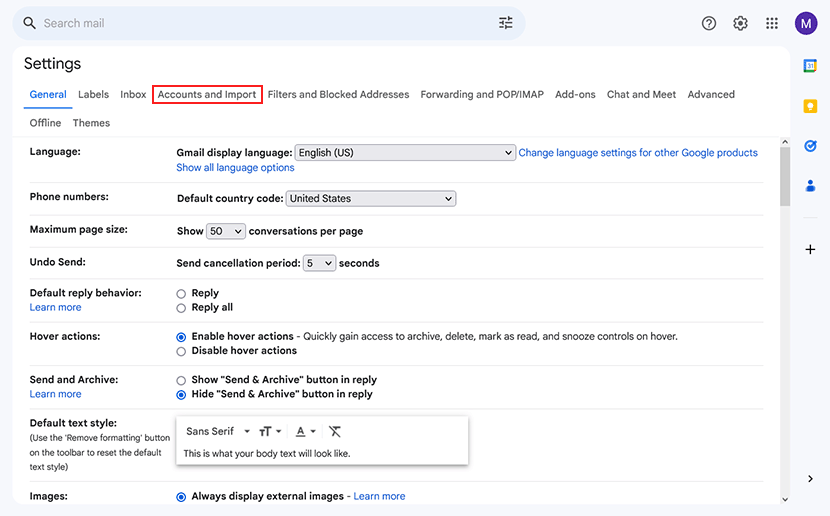
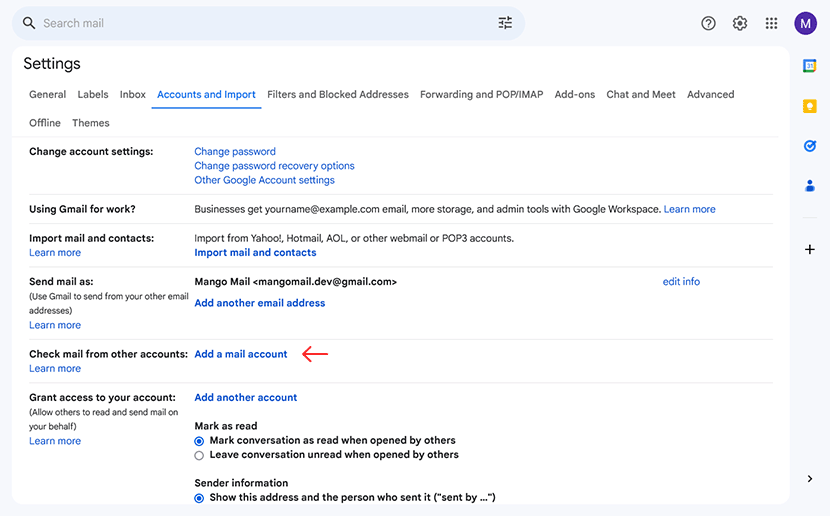
Step 4. Click "Add a mail account".
Step 5. Enter your Mango Mail address, then click "Next".

Step 6. Select "Import emails from my other account (POP3)", then click "Next".
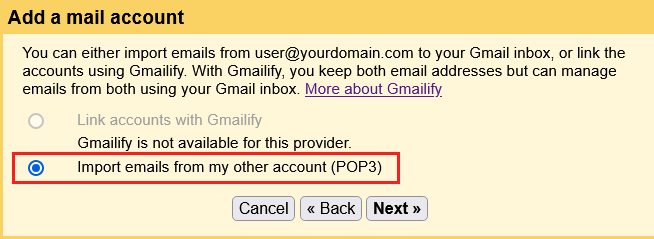
Step 7. Select "Import emails from my other account (POP3)", then click "Next".
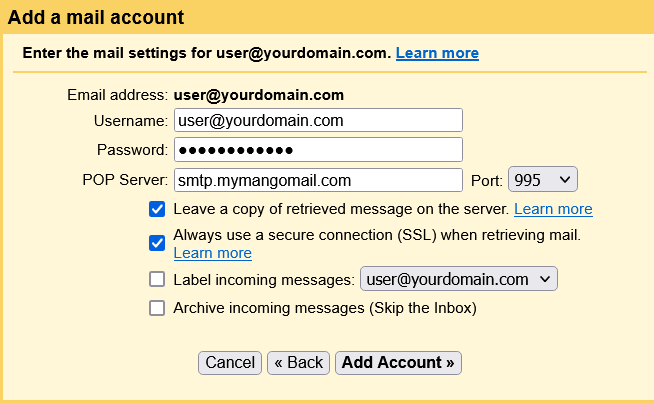
Step 8. Choose "Yes", then click "Next".
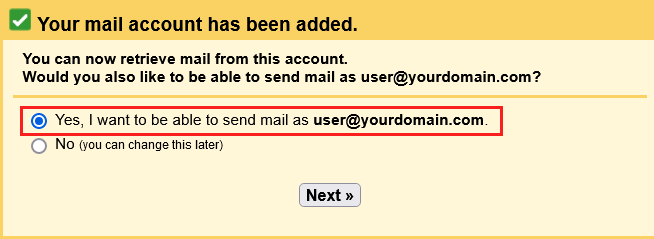
If you only wish to read mail from your Mango Mail address and not send on the Gmail web client, you can select "No" and skip the remaining steps.
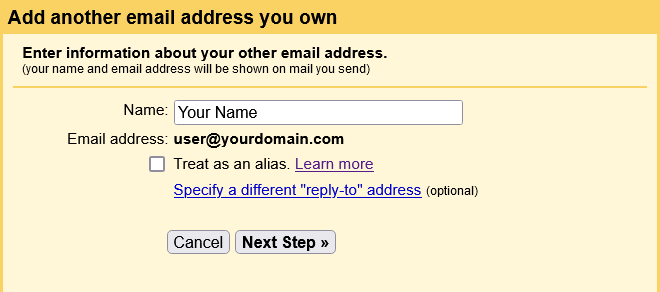
Step 9. Enter the name you wish to send mail as and your Mango Mail address. Uncheck "Treat as alias", then click "Next"
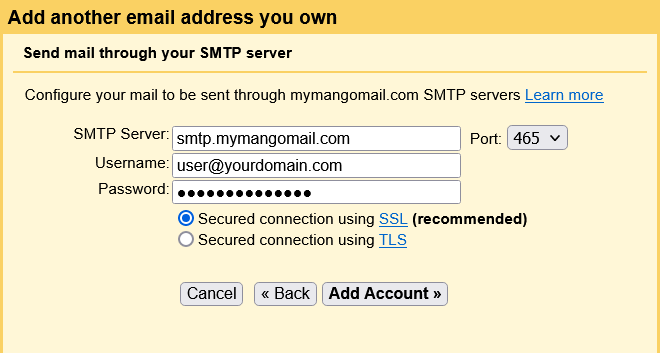
Step 10. Use the following settings to connect to Mango Mail's outgoing servers, then click "Next".
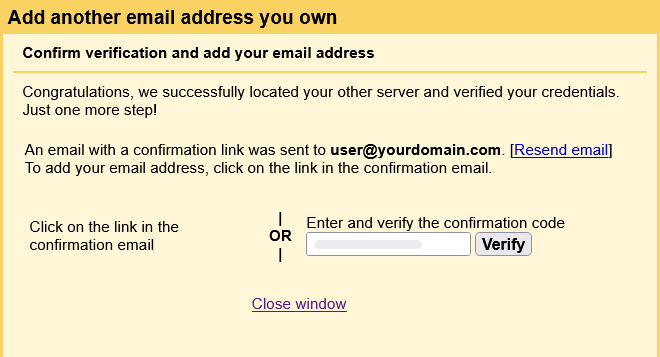
Step 11. Finally, you will receive a confirmation email to your Gmail account. Click on the link or enter the code to verify.
Next Steps
Now that you've finished connecting your Mango Mail address to the Gmail web client, you can seamlessly access your personal and professional emails all in one interface. Be sure to check out the other setup guides to get the best emailing experience.


